Contents
HƯỚNG DẪN CÀI ĐẶT MÔ HÌNH WEBSERVER LAMP (APACHE, LÊN SERVER CENTOS 6.
Xin chào các bạn!
Đến với bài viết này kỹ thuật sẽ hướng dẫn các bạn cách cài đặt mô hình webserver LAMP lên hệ điều hành centos 6. LAMP là một mô hình webserver rất thông dụng và chiếm hơn 50% số lượng sử dụng, mô hình LAMP bao gồm một nhóm các phần mềm mã nguồn mở là Apache, MySQL, PHP. Bây giờ chúng ta bắt đầu đi vào các bước để cài đặt và cấu hình, lưu ý các bước thực hiện dưới đây đều thực hiện ở root.
Bước 1: Cài đặt Apache.
Apache là một phần mềm nguồn mở miễn phí chạy trên 50% máy chủ web của thế giới.
Để cài đặt apache, ta dùng lệnh này:
yum install httpd -ySau khi nhận thông báo như hình dưới là đã cài đặt thành công.

Sau khi cài đặt ta bắt đầu khởi động dịch vụ httpd lên bằng lệnh sau:
service httpd startĐể kiểm tra xem Apache đã hoạt động được hay chưa các bạn có thể dùng trình duyệt truy cập vào bằng địa chỉ IP của server. Có rất nhiều cách để xem địa chỉ IP của máy chủ, ở đây kỹ thuật gợi ý cho bạn sử dụng dòng lệnh sau để xem chính xác IP của máy chủ.
ifconfig venet0:0 | grep inet | awk '{ print $2 }'
Lệnh này sẽ cho ta biết IP của máy chủ chúng ta như hình bên dưới.

Ta truy cập vào bằng trình duyệt, nếu cho kết quả như sau quá trình cài đặt Apache đã hoàn thành.

Apache đã cài đặt thành công ta tiếp tục cài đặt MySQL.
Bước 2: Cài đặt MySQL.
MySQL là một hệ thống quản lý cơ sở dữ liệu mạnh mẽ được sử dụng để tổ chức và lấy dữ liệu trên một máy chủ.
Để cài đặt MySQL, ta dùng lệnh sau:
yum install mysql-server -y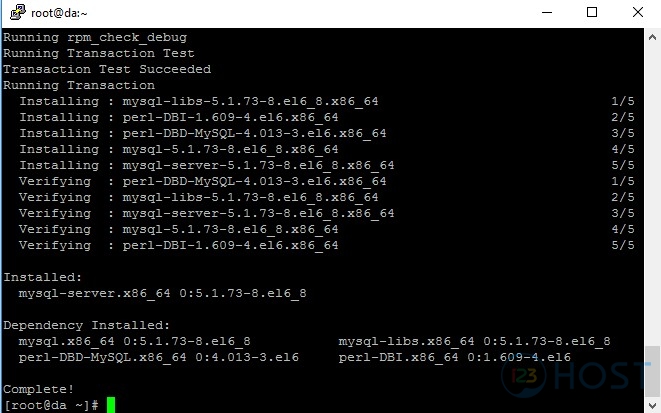
Cài xong ta tiếp tục bật dịch vụ mysql lên:
service mysqld start
Tiếp theo ta dùng lệnh sau để cài đặt một số thứ cơ bản cho MySQL.
/usr/bin/mysql_secure_installationKhi thực hiện lệnh trên MySQL sẽ yêu cầu hỏi mật khẩu tài khoản root, ta enter để bỏ trống do là lần cài đặt đầu tiên.
Enter current password for root (enter for none):
OK, successfully used password, moving on...
Ta tiến hành đặt mật khẩu cho tài khoản root như hình dưới.
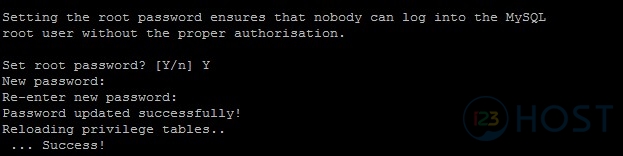
Sau đó Mysql sẽ liên tục hỏi hàng loạt câu hỏi ta chỉ nhấn Y để tiếp tục, quá trình cài đặt này sẽ diễn ra tự động.
By default, a MySQL installation has an anonymous user, allowing anyone
to log into MySQL without having to have a user account created for
them.  This is intended only for testing, and to make the installation
go a bit smoother.  You should remove them before moving into a
production environment.

Remove anonymous users? [Y/n] Y
 ... Success!

Normally, root should only be allowed to connect from 'localhost'.  This
ensures that someone cannot guess at the root password from the network.

Disallow root login remotely? [Y/n] Y
... Success!

By default, MySQL comes with a database named 'test' that anyone can
access.  This is also intended only for testing, and should be removed
before moving into a production environment.

Remove test database and access to it? [Y/n] Y
 - Dropping test database...
 ... Success!
 - Removing privileges on test database...
 ... Success!

Reloading the privilege tables will ensure that all changes made so far
will take effect immediately.

Reload privilege tables now? [Y/n] Y
 ... Success!

Cleaning up...

All done!  If you've completed all of the above steps, your MySQL
installation should now be secure.

Thanks for using MySQL!
Sau khi hoàn thanh ta tiếp tục bước tiếp theo.
Bước 3: Cài đặt PHP.
PHP là một ngôn ngữ biên dịch web mã nguồn mở được sử dụng rộng rãi để xây dựng trang web động.
Để cài đặt PHP trên máy chủ các bạn có thể dùng lệnh này:
yum install php php-mysql -y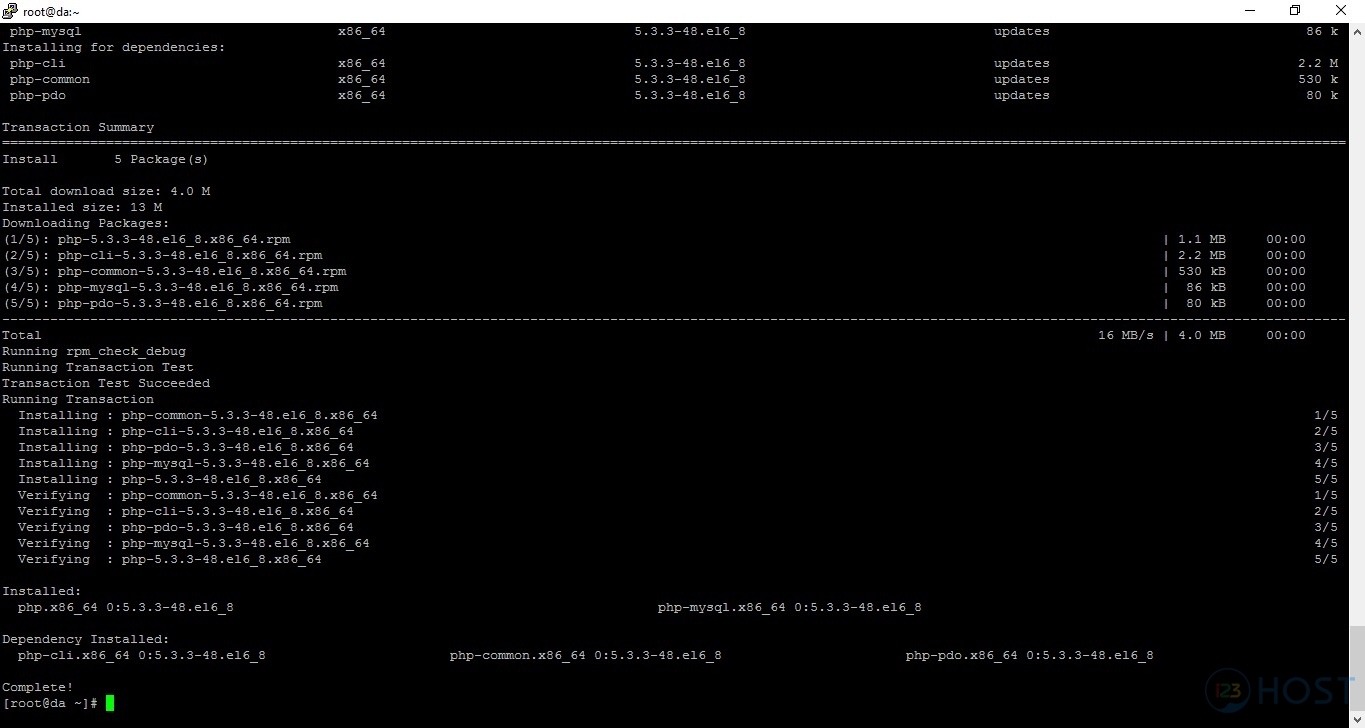
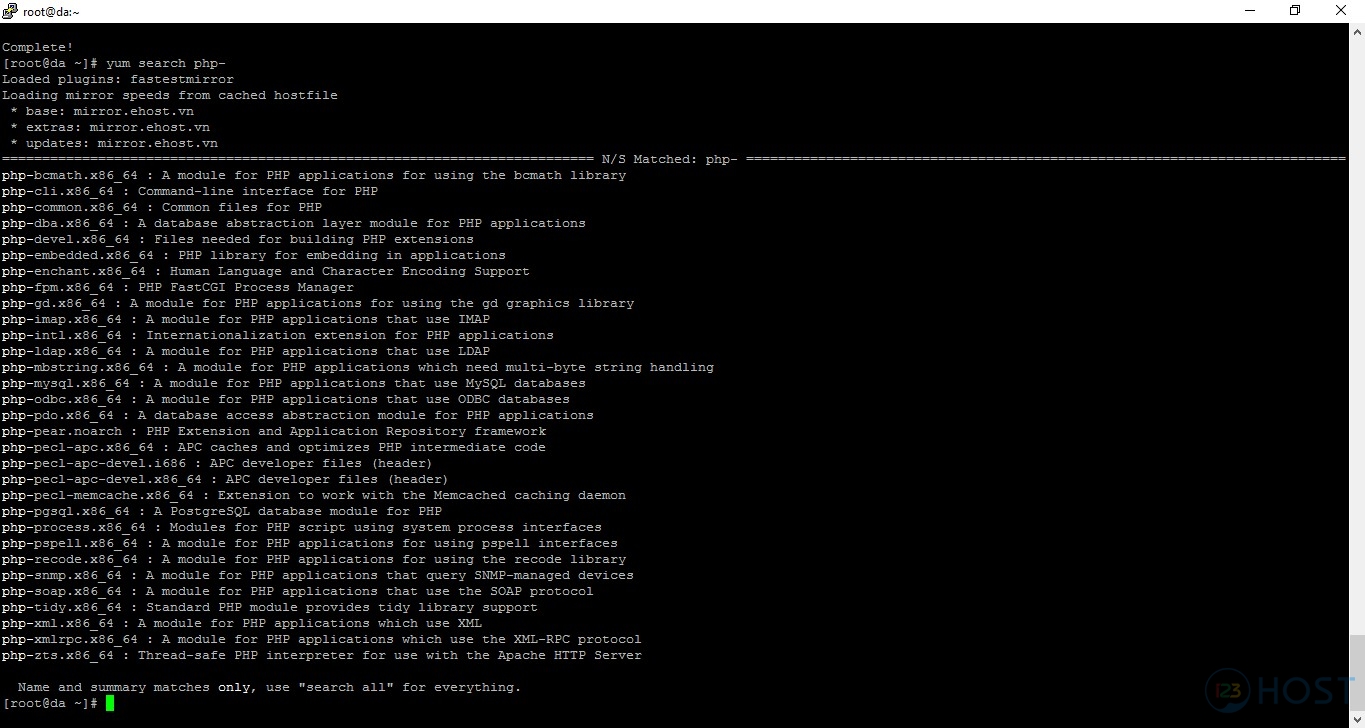
PHP có rất nhiều các module cần thiết các bạn dùng lệnh sau để tìm kiểm tên các module:
yum search php-Lệnh này sẽ cho ta biết các module như sau:
php-bcmath.x86_64 : A module for PHP applications for using the bcmath libraryphp-cli.x86_64 : Command-line interface for PHPphp-common.x86_64 : Common files for PHPphp-dba.x86_64 : A database abstraction layer module for PHP applicationsphp-devel.x86_64 : Files needed for building PHP extensionsphp-embedded.x86_64 : PHP library for embedding in applicationsphp-enchant.x86_64 : Human Language and Character Encoding Supportphp-fpm.x86_64 : PHP FastCGI Process Managerphp-gd.x86_64 : A module for PHP applications for using the gd graphics libraryphp-imap.x86_64 : A module for PHP applications that use IMAPphp-intl.x86_64 : Internationalization extension for PHP applicationsphp-ldap.x86_64 : A module for PHP applications that use LDAPphp-mbstring.x86_64 : A module for PHP applications which need multi-byte string handlingphp-mysql.x86_64 : A module for PHP applications that use MySQL databasesphp-odbc.x86_64 : A module for PHP applications that use ODBC databasesphp-pdo.x86_64 : A database access abstraction module for PHP applicationsphp-pear.noarch : PHP Extension and Application Repository frameworkphp-pecl-apc.x86_64 : APC caches and optimizes PHP intermediate codephp-pecl-apc-devel.i686 : APC developer files (header)php-pecl-apc-devel.x86_64 : APC developer files (header)php-pecl-memcache.x86_64 : Extension to work with the Memcached caching daemonphp-pgsql.x86_64 : A PostgreSQL database module for PHPphp-process.x86_64 : Modules for PHP script using system process interfacesphp-pspell.x86_64 : A module for PHP applications for using pspell interfacesphp-recode.x86_64 : A module for PHP applications for using the recode libraryphp-snmp.x86_64 : A module for PHP applications that query SNMP-managed devicesphp-soap.x86_64 : A module for PHP applications that use the SOAP protocolphp-tidy.x86_64 : Standard PHP module provides tidy library supportphp-xml.x86_64 : A module for PHP applications which use XMLphp-xmlrpc.x86_64 : A module for PHP applications which use the XML-RPC protocolphp-zts.x86_64 : Thread-safe PHP interpreter for use with the Apache HTTP Server
Để biết thêm chi tiết công dụng và chức năng của từng module các bạn có thể dùng lệnh sau để tìm hiểu.
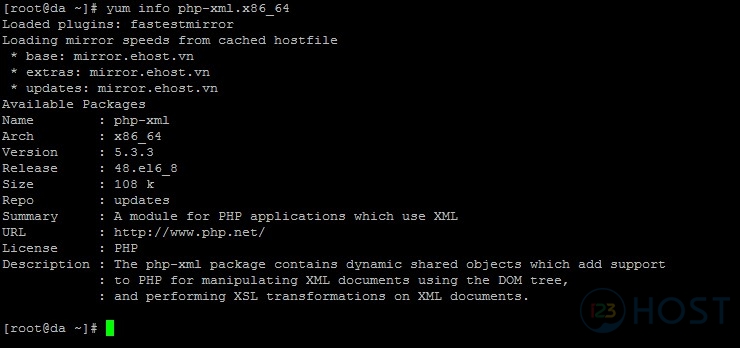
yum info tên_của_module Ví dụ: yum infophp-xml.x86_64
Để cài đặt một module nào đó ta dùng lệnh sau để cài đặt.
yum installtên_của_module| ví dụ:yum installphp-xml.x86_64
Đến đây quá trình cài đặt và cấu hình mô hình LAMP gần như đã hoàn thành, ta chỉ việc thực hiện việc kiểm tra lại bằng file info.php.
Ta tiến hành cấu hình cho dịch vụ mysql và apache khởi động theo hệ thống, ta dùng lệnh sau:
chkconfig httpd on
chkconfig mysqld on
Bước 4: Tạo file info.php kiểm tra hoạt động.
Để tạo file info ta có thể dùng lệnh sau:
vi /var/www/html/info.phpTa thêm các thông tin sau vào file.
<?php
phpinfo();
?>
Ta lưu lại và thoát ra, dùng lệnh sau để khởi đông lại tiến trình Apache.
service httpd restartSau khi khởi động lại ta dùng trình duyệt ta dùng trình duyệt để truy cập vào theo đường dẫn sau:
http://IP_của_máy_chủ/info.php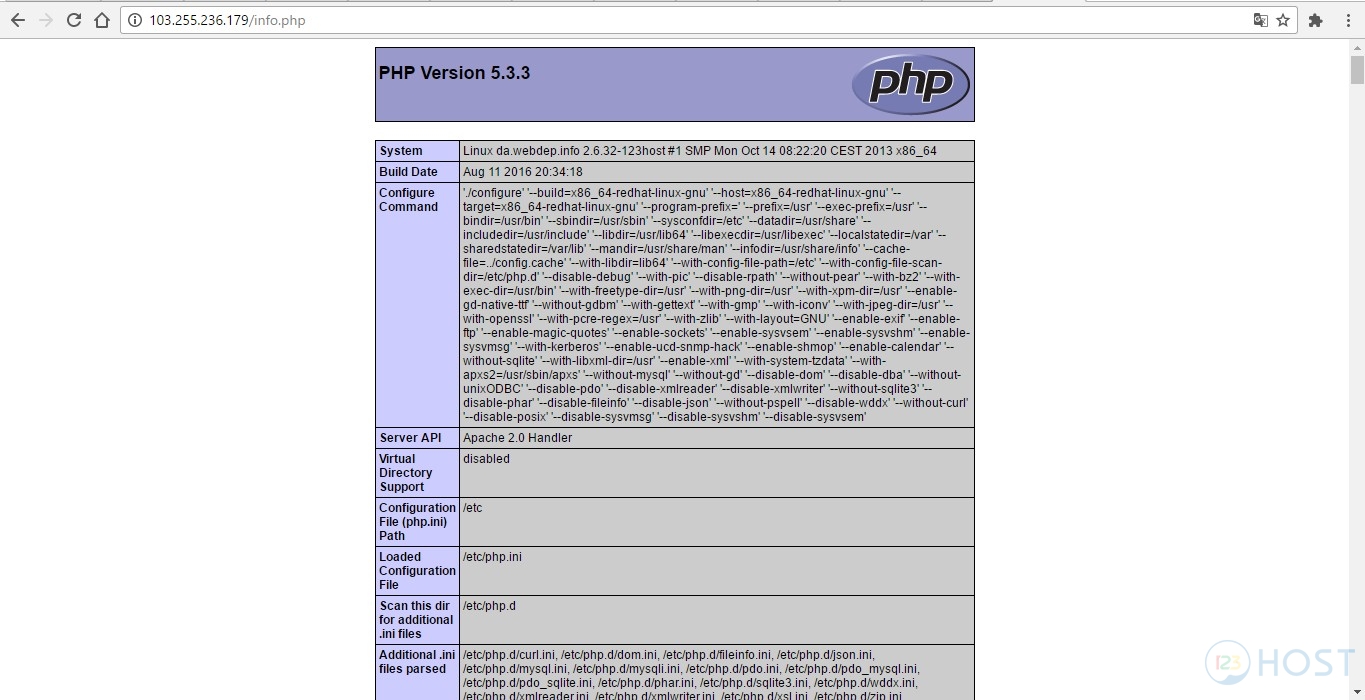
Nếu được kết quả như hình trên là quá trình cài đặt LAMP của chúng ta đã thành công và LAMP đã hoạt động.
Cám ơn các bạn đã theo dõi, Xin cám ơn!
Chúc các bạn thành công!

Leave A Comment?